giswerk.org
MAPIR Survey 2
Peau Production offers some useful stuff around micro uav camera equipment. The MAPIR cameras are fairly cheap converted action cams most probably a re branded Gitup cam. Unfortunately it comes along without activated WiFi but with a new lens and calibrated filter options for 6 different wavelength bands.
Basic setup instructions
Basically all of the cams can be set up in a similar way. The camera has three buttons. power ‘‘P’’, menu ‘‘M’’ (WiFi) and the trigger ‘‘T’’ button. All settings can be reached by this three buttons.
The default settings as provided by Peau Productions are fairly OK if you fly under good illumination conditions. For autonomous flights You need to set the time lapse rate of the camera:
- Power on the camera ‘‘P’’, press ‘‘M’’, press 3 times ‘‘P’’ again and use the ‘‘T’’ button to change time lapse to 0.5 sec.
Pre-flight setup instructions
Before using the MAPIR cams please check the above settings. Next step is to synchronize the time settings as similar as possible with the GPS derived time. In the field you may use an app providing you the GPS time. For now you can use the page of the time-nuts tvb LeapSecond.com as embedded below.
<html><iframe src="http://www.leapsecond.com/java/gpsclock.htm" frameborder="0" width=750 height="180" allowfullscreen="true" mozallowfullscreen="true" webkitallowfullscreen="true"></iframe></html>
Please do as follow:
- Power on the camera ‘‘P’’, then press again ‘‘P’’ four times until you see the system settings screen.
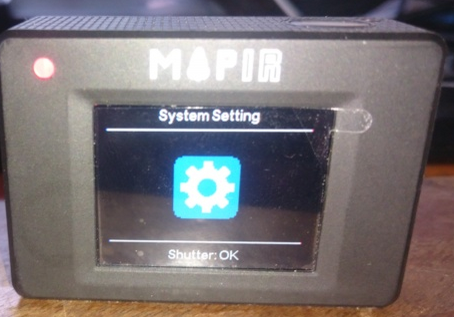
Press the trigger button ‘‘T’’ then press 8 times ‘‘P’’ until you activate the time and date settings.
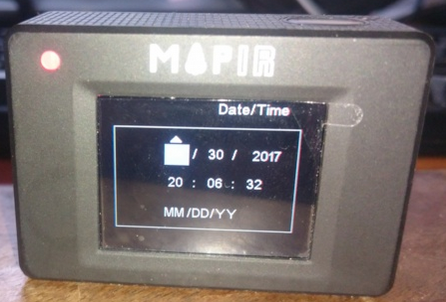
Press ‘‘T’’ again for navigating to the appropriate date and time parameter. Usually you need to fix the seconds only. Set the time 10 seconds or so to the future of the current GPS time. You can change the settings with the ‘‘P’’ button. When the GPS time is reaching the preset camera time press 2 times the ‘‘M’’ button. This is the most exact (about 1 sec) manually way to fix the time to GPS. You have to to so with all cameras at least once a week.
Basic survey settings
Even if it strongly depends on the illumination and weather conditions You will find here some thumb rules.
First Survey flight
From this survey, you typically get Dense Point Clouds, DEMs, DSMs, NDVI data, Orthoimagery that means NIR or RGB images, which are the originally stitched images.
Method
You have to fly in an autonomous mode called task or mission flying over the target area and taking regularly pictures of the ground as you fly by. The photos must have an overlap in both directions. By having this overlap and side lap e.g. Agisoft Photoscan is able to align the photos.
Recommended Parameters
-
Ground Speed (aircraft speed): 20 km/h
-
Above Ground Altitude (AGL): 100m
-
Pattern: striped pattern
-
Survey Grid Angle: If windy, perpendicular to wind direction. If no wind, optimized for least switchbacks.
-
Photo sidelap: 80%
-
Photo overlap: 80% (set camera to the minimaltime lapse at least a photo every 5 seconds). You may increase the overlap up to 90% but then you have to fly slower or increase the rate of pictures that are taken.
-
Survey Grid Area: at least 50 meters beyond each side of the target survey area.
Near surface flight
From this type of survey, you typically will get high resolution dense point clouds, micro-relief DEMs, DSMs, and all products in a resolution of about one cm/pixel.
Method
You fly an autonomous mission over the target area and taking regularly pictures of the ground. The photos must have an higher overlap in both directions than during the basic task.
Recommended Parameters
-
Ground Speed (aircraft speed): 5-10 km/h
-
Above Ground Altitude AGL: below 50m NOTE: ground means surface!
-
Pattern: striped pattern
-
Survey Grid Angle: If windy, perpendicular to wind direction. If no wind, optimized for least switchbacks.
-
Photo sidelap: 90%
-
Photo overlap: 90% (set camera to the minimal time lapse at least a photo every 5 seconds).
-
Survey Grid Area: at least 20 meters beyond each side of the target survey area.