Mission Planning on basis of QGroundcontrol
Chris Reudenbach
2024-06-07
Source:vignettes/uavRmp_2.Rmd
uavRmp_2.RmdPlanning the Flight task with the Missionplanner or Qgroundcontrol survey feature
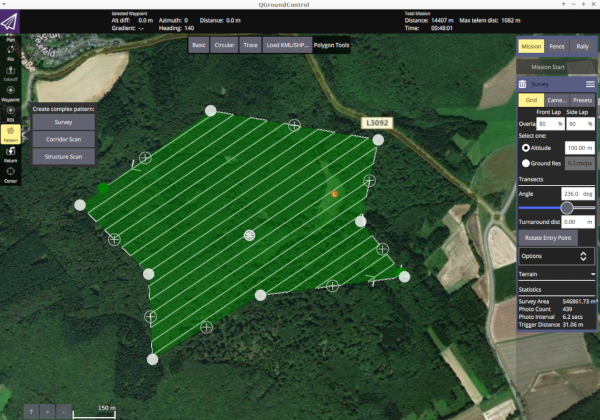
We want to plan a flight in a structured terrain in the upper
Lahn-valley. Start the QGroundcontrol and navigate to Mission tab and
open Pattern->Survey. Start digitizing a pattern as you want and also
fill in the values on the right sided menus for camera angel overlap and
so on. 
Save this at an appropriate folder. To use this planning file you
have to set in makeAP the switch:
useMP = TRUEThe planning with QGroundControl is much more powerful and comfortable than the simple planning with uavRmp. However, if you want to use some features like near-surface flights or more important a survey planning for DJI/Litchi, some parameters have to be set very carefully to make this export usable. Especially the Litchi export needs some care. Not all parameters from the Qgroundcontrol settings are taken over. Crucial is:
- Set correct camera parameterization
- choose
calc above terrainand a reasonabletolerancefilter (<=5)
With the parameters: horizonFilter,
followSurfaceRes, altFilter the behavior of
the smoothing of the flight curve is set. It makes sense to keep the
values the same at first. If the followSurfaceRes is set
bigger than the distance of the single flight lines it will be
automatically reduced.
By default noFiles is set to one. Due to the modern UAVs
it is strongly recommended to keep it so. If you want to calculate
single tasks you may set it to the number you need. However the task
splitting is switched off which is useful for the modern DJI UAVs
because you can use every waypoint in as a manual starting point for the
continuation of the task after a battery change.
Note: For a problem-free terrain contour flight it
is obligatory to set the parameter
above_ground = FALSE.
The example below shows a meaningful example for an Air 2S DJI and a 30m ASL flight over beech wood with default settings.
demFn <- system.file("extdata", "mrbiko.tif", package = "uavRmp")
tutorial_flightArea <- system.file("extdata", "tutdata_qgc_survey30m.plan", package = "uavRmp")
fp <- makeAP(projectDir = tempdir(),
             surveyArea = tutorial_flightArea,
             useMP = TRUE,
             above_ground = FALSE,
             demFn = demFn,
             uavType = "dji_csv"
             )
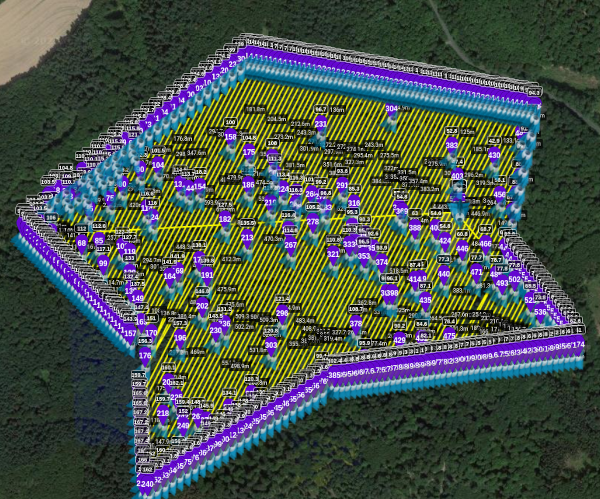
The result looks like this in Litchi.

It is easy to see that there are major errors in the transmission.
These resuls from the (a) a complex outer hull of the structure and that b) the turning points which are necessary to maintain the lateral overlap are filtered out in the DSM analysis. There are some simple ways to overcome this structural problem:
- increase the distance of synthetic waypoints:
followSurfaceRes = 2 - in doubt choose the same value for the argument that controls the
the rolling filter.:
horizonFilter = 2 - adapt the number of waypoints to your needs e.g..:
altFilter = 5.0 - increase the argument buf_mult to e.g.:
buf_mult = 3
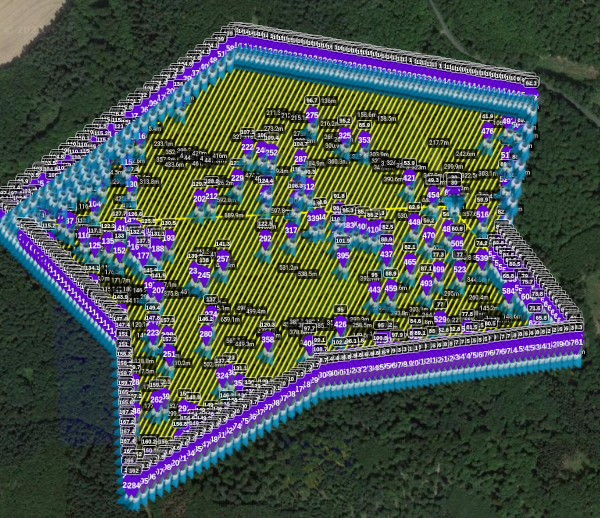
So adding a extended turning point tolerance (buf_mult)
the results looks like below:
demFn <- system.file("extdata", "mrbiko.tif", package = "uavRmp")
tutorial_flightArea <- system.file("extdata", "tutdata_qgc_survey30m.plan", package = "uavRmp")
fp <- makeAP(projectDir = tempdir(),
             surveyArea = tutorial_flightArea,
             useMP = TRUE,
             buf_mult = 3,
             above_ground = FALSE,
             demFn = demFn,
             uavType = "dji_csv"
             )
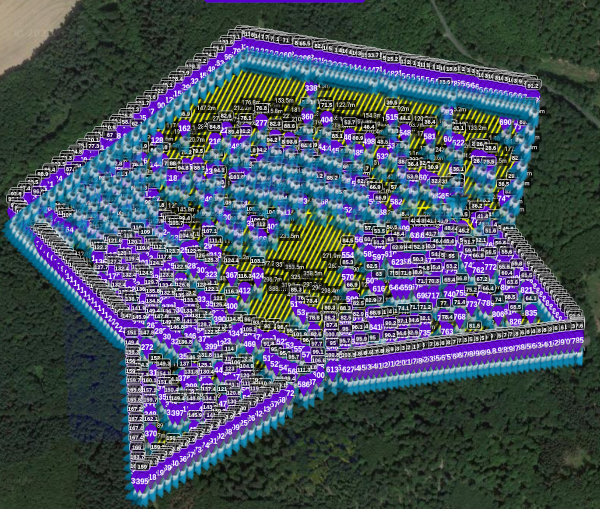
Modifying the terrain following control arguments
followSundrfaceRes, horizonFilter and
altFilter will yield in a much more detailed control
file:
demFn <- system.file("extdata", "mrbiko.tif", package = "uavRmp")
tutorial_flightArea <- system.file("extdata", "tutdata_qgc_survey30m.plan", package = "uavRmp")
fp <- makeAP(projectDir = tempdir(),
             surveyArea = tutorial_flightArea,
             useMP = TRUE,
             buf_mult = 3,
             followSurfaceRes = 2,
             horizonFilter = 2,
             altFilter = 5,
             above_ground = FALSE,
             demFn = demFn,
             uavType = "dji_csv"
             )